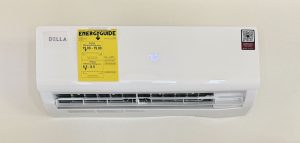
So far, you have mastered the art of indoor mini split hanging. Now it’s time to get the outdoor unit ready to go. Let’s go ahead and dive right in.
If you missed Part One – Installing the Indoor Unit, please go check that out first.
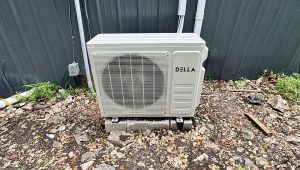
1. Prepare a spot for your unit
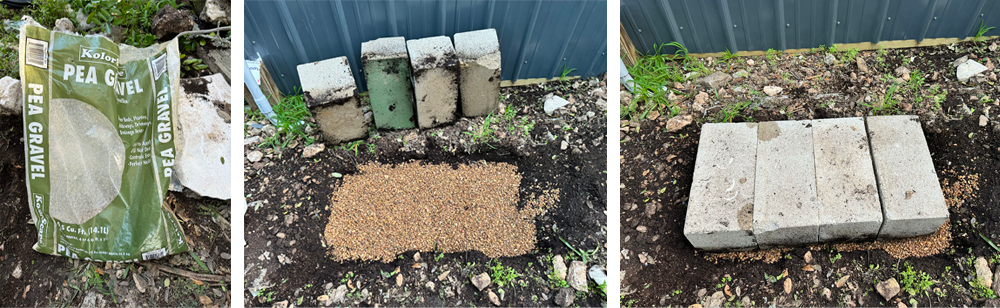
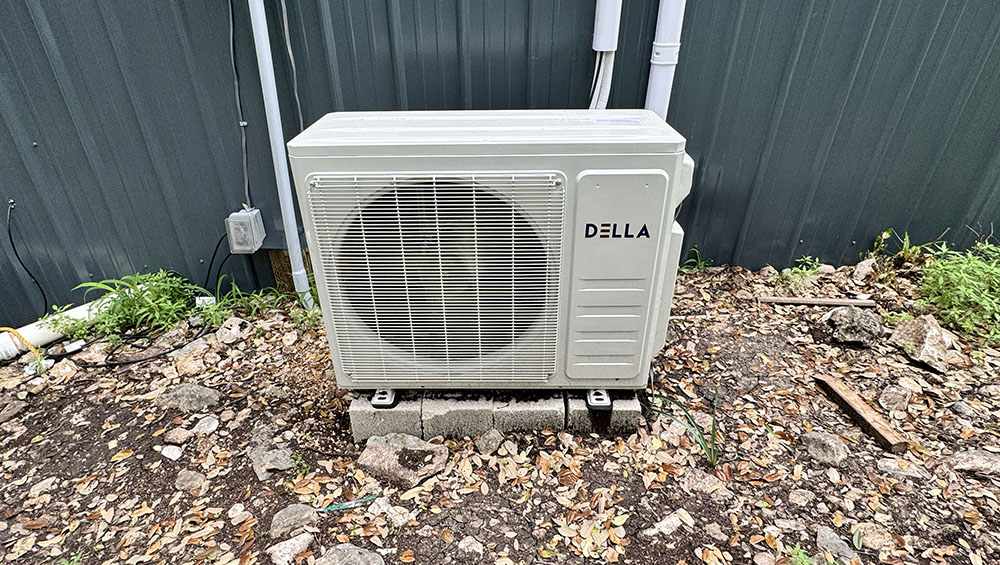
First, we need a nice level spot to place our outdoor unit. It should be about a foot away from the house to make sure there is plenty of ventilation. Since I definitely did NOT have that, I used a few spare cinder blocks that I had laying around and created a nice level surface. If you are placing your unit on existing concrete, then you can skip this step. Otherwise, I find the easiest way to create a solid and level surface is to first do my best with a shovel. I then add pea gravel and spread it out evenly with a rake. Then add something solid like pavers or cinder blocks.
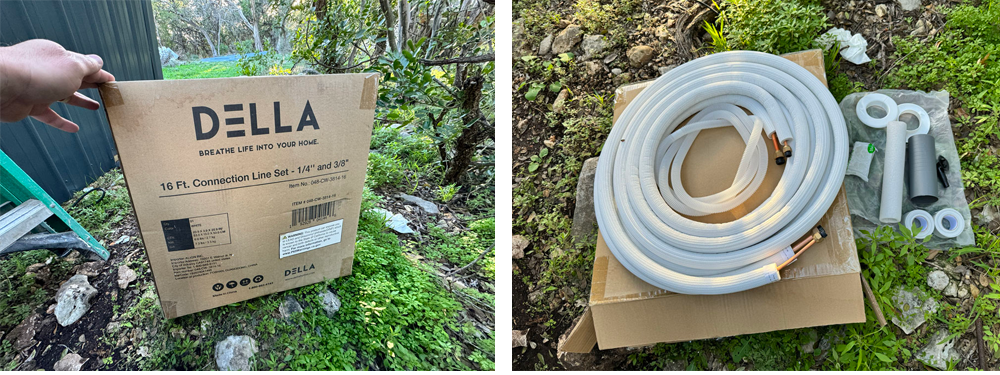
Next, open up that included box of accessories and copper line set.
2. Move Your Unit In Position
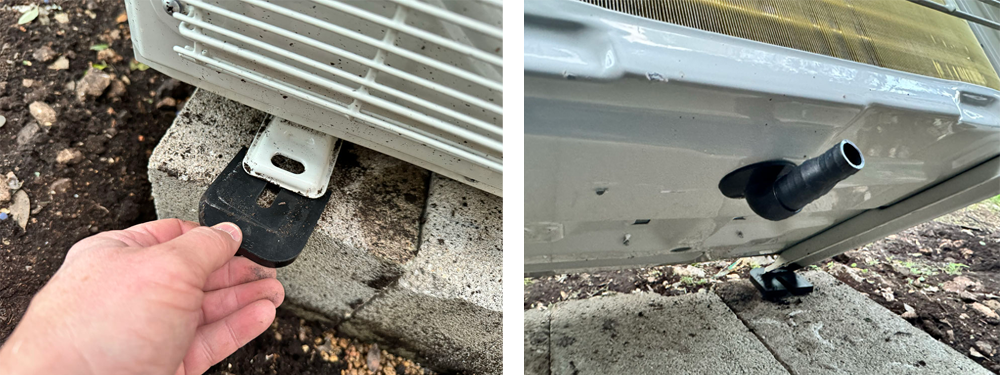
Place your outdoor unit on your leveled pad and add the drain spout and rubber feet. The rubber pads will keep your unit from making a lot of annoying rattling noise when it runs. If you wanted to, you could use concrete anchors and screw the outdoor unit down to your pad, but I have never found this necessary.
3. Connect Line Sets to the Indoor Unit

Next, you’re gonna want to turn your copper lines toward your outdoor unit’s position. For you, this could mean going strait down or to the right. For my installation, I needed to turn them to the left. Again, BE CAREFUL when bending your copper tubing and don’t kink it.

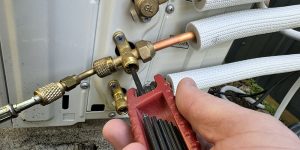
Next we’re going to connect our copper line sets. When uncoiling the lines, make sure to unwind them in a circle, and DO NOT just stretch them apart. I’m starting here with the smaller of the lines. The small line coming out of the indoor unit has a plastic plug that you will unscrew off and discard. These units come pressurized and removing the plug will release pressure from the line, so don’t be alarmed.
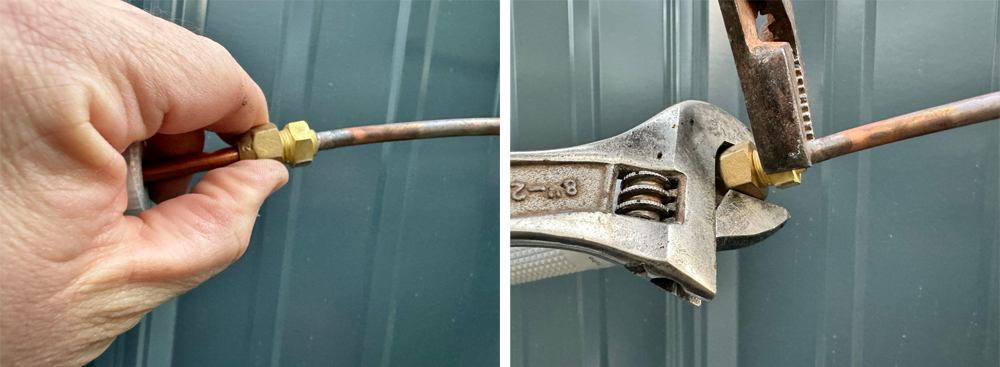
Connect the lines together by first hand tightening. Be SURE to make the best connection possible. If you don’t get the flare seated good, the line could leak. Once you have done your best to screw it together by hand, use your crescent wrench and channel locks to tighten well. When tightening, be sure not to twist the lines. Once you have the small line connected, go ahead and repeat the process with the larger line.
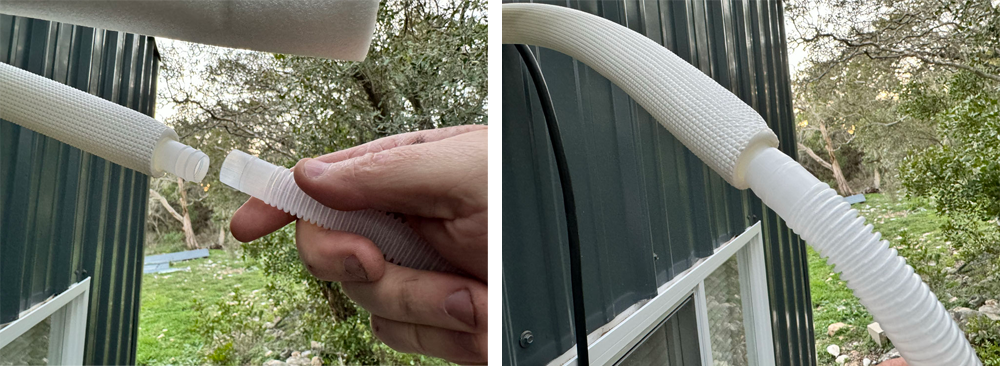
Next, you need to connect the drain line extension. The extension tube is designed to fit over the other end. It takes a little bit of force to get them together. Make sure to push them completely together.

Now, you should have all of your lines connected like this.
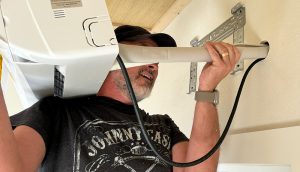
4. Connect Line Sets to the Outdoor Unit
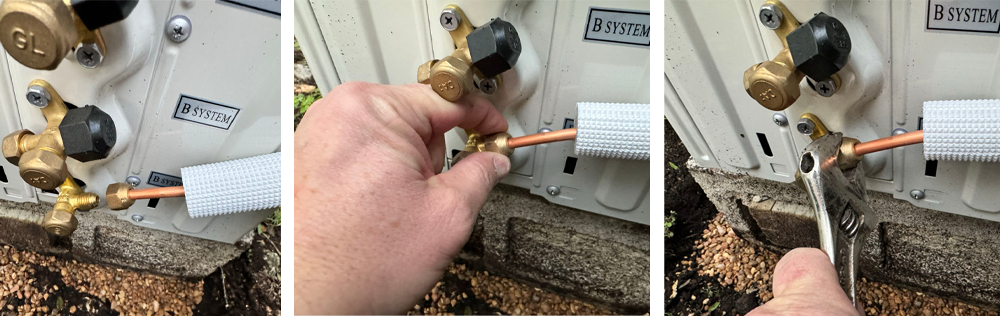
Now we’re going to connect the lines to the outside unit, starting with the smaller side. In my case, I am installing a 2-room mini split, so I have two sets of connections. If you are installing a multi-room system, make sure to pay attention to how they are labelled (A and B in my case). You will want to make sure that all the connections from one room (electrical and copper tubing) go to the same letter.
First unscrew and remove the protective cover. Then – just as we did with the other connection – you will want to make sure the flare is seated good and hand-tighten. Then tighten well with a wrench. Once you are done with the smaller line, repeat the steps to connect the larger line.
5. Bundle Your Lines Together
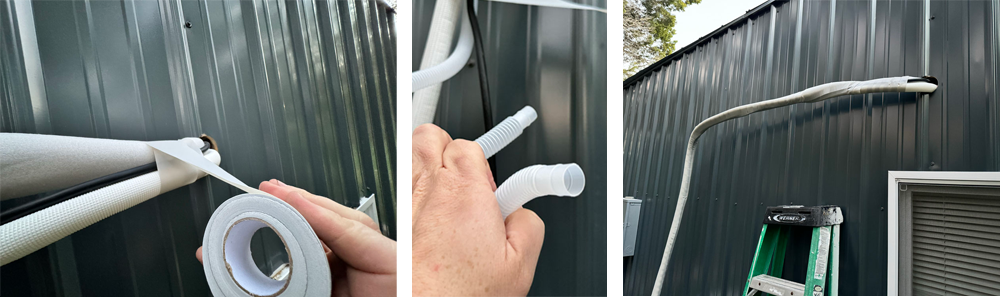
At this point, I opted to go ahead and bundle the lines together (Use the roll of vinyl tape that is included in the box). This tidies things up, makes managing the lines much easier and prepares them for installing the line set cover later. It’s important to keep the drain tube on the bottom of the bundle. Depending on how long of lines you are installing, you may need to add another extension to the drain tube.
6. Connect the Electrical Cables
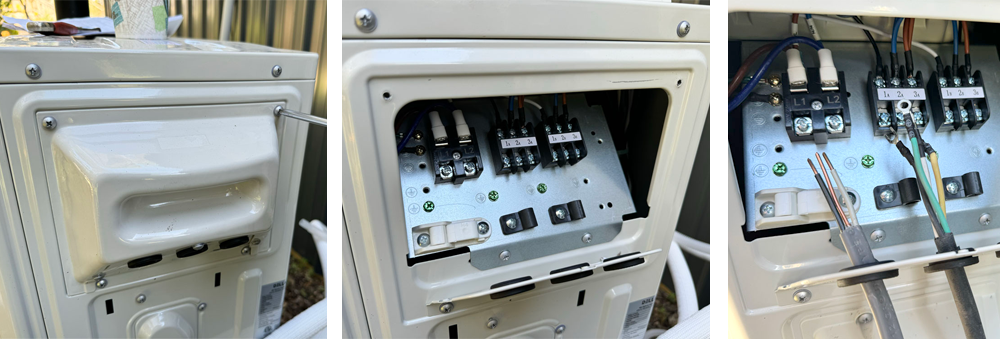
Next we’ll make our electrical connections. This obviously requires that you have a power source ready to connect. According to the specs for the unit I was installing, it requires a 12amp, 220v power source.
Installing this line is outside the scope of this guide, but I will include a quick text-only description of how it was done. My breaker box for this house was right next to my mini split outdoor unit location. I just added a double 20-amp breaker (a double breaker is for 220v sources and a single breaker is for 110v) to the outside box. This requires to knock out one of the small holes in the box for the wire to feed through. I then ran the necessary length of 12/2 outdoor Romex wire to the unit. It is recommended to feed your wire through electrical conduit (basically a grey-colored PVC) for maximum protection. In my case, I opted for a quick down-and-dirty version and just used outdoor-rated Romex (it is grey in color and is designed to withstand UV rays from the sun).
Open the electrical cover by removing the four screws, then feed your wires through the provided holes.
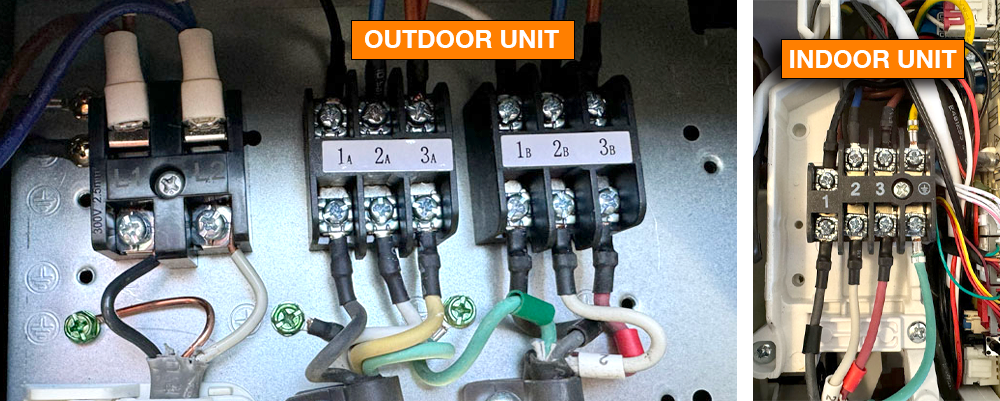
Making SURE YOUR POWER SOURCE IS NOT ENERGIZED, connect the power to the L1 and L2 terminals. Since this is a 220v system, it doesn’t matter which color goes to which, since they are both “hot” and there is no neutral.
Because I am installing a 2-room system, I have connections for two indoor units (A & B). Obviously, if you are installing a single-room system there will only be one. You’ll also notice that the two wire bundles that came with my unit have two sets of colors. That is why it is important to take a photo when you make your indoor unit connections. Compare that photo to this electrical panel, and make sure you add the right colored wire to the same numbered terminal (1, 2, or 3). The green ground wire will go to the green screw.
Now you have all your connections made! The final stage in the process will be vacuuming your lines and opening the valves to let your system fill with freon. We’ll cover this process in the next article.
How to Install a Mini Split – Our Step-by-Step Guide
Mini Split Install – Vacuuming and Charging
Mini Split – Outdoor Unit & Making the Connections
Mini Split – Installing the Indoor Unit