
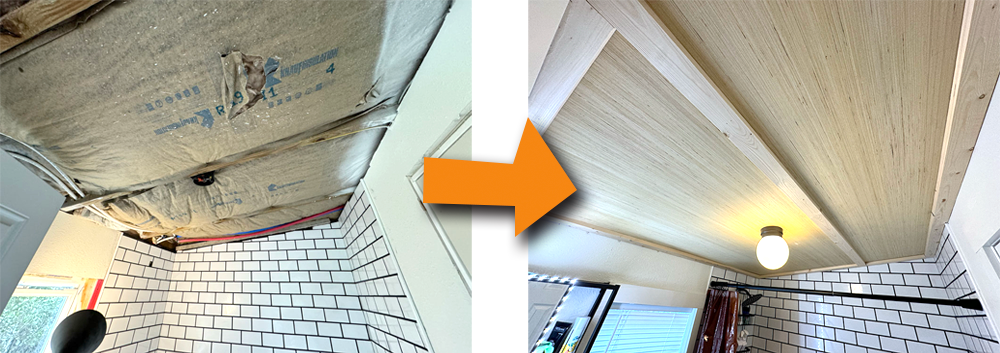
Most ceiling designs tend to be very boring – just large swaths of square footage covered in textured white paint. BLAH! Check out this easy and cheap alternative ceiling design that can be installed as an original ceiling (as we will show here) or on top of your existing boring sheetrock.
Sheetrock ceiling installation is so difficult because of how heavy it is. One of the things I like most about THIS idea is that it is so easy to lift and hold these light sheets of luan plywood while you nail it up.
Okay, let’s get started.
Tools Needed:
Must-have:
- Circular Saw
- Pencil
- Tape Measure
- Straight Edge (either a tool or a straight board)
Might Need:
- Phillips screwdriver
- Flat-head screwdriver
- Hammer
Great to have:
- Miter Saw
- Screw gun
- Multi-tool with wood-cutting blade
- Powered Finish Nailer
Materials Needed:
- 4×8 ft. Luan Plywood
This is the really thin plywood that is similar to wood panelling, but without the decorative lines. It is also the cheapest plywood you can find in 4×8 sheets. - 1x3x8 Common Boards
It is your preference whether you would want 1x3s or 1x4s for your ceiling. (In this article I use 1x3s). This is one of the most inexpensive boards you can get and they look great. Just take some care when picking them out at the lumber store. You want to make sure they are straight and not twisted and don’t have too many knots or holes. - Finish Nails
Whether you use a finish nailer or are going the old-fashioned-way with a hammer – this will obviously determine the type of nails you need to buy. I obviously recommend using a nailer and getting a few packs of finish nails. It’s much easier to hold the plywood up and nail it with a powered nailer than trying to hold plywood AND the nail while hammering it.
Step 1 – Prep the Ceiling
If this is an existing ceiling you are working on (not new construction), then you will need to remove any light fixtures. Be sure to turn off your electrical breaker first.
Step 2 – Put up the Plywood
These luan sheets have two very different-looking sides. You want to determine right up front which side you prefer and stick to that the whole time. Even if you plan to paint the ceiling afterwards, the texture will probably appear very different from one side to the other.
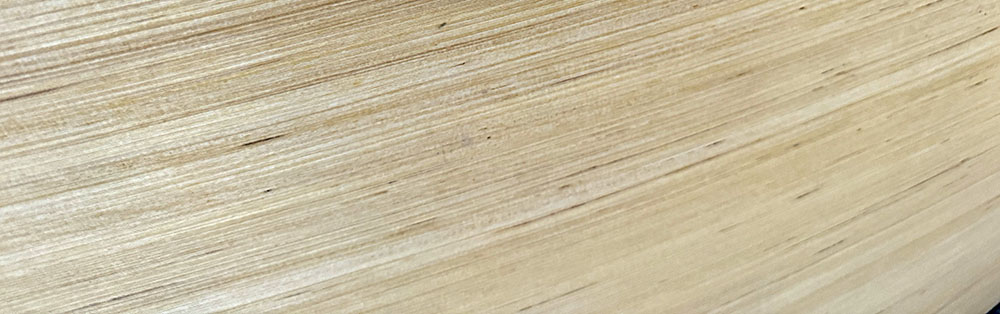
Also note that the sheet has a very obvious grain direction. If you are planning to leave the wood unpainted like we did, you will want to ALWAYS put the sheets up with the grain going the same way.
With the help of a compadre, hold the sheet up and nail it. If you are applying on top of sheetrock, you might be able to get away with nailing it into sheetrock anywhere – but it is always preferable to hit a wood rafter (when we get to nailing the 1x3s, hitting a rafter becomes critical).
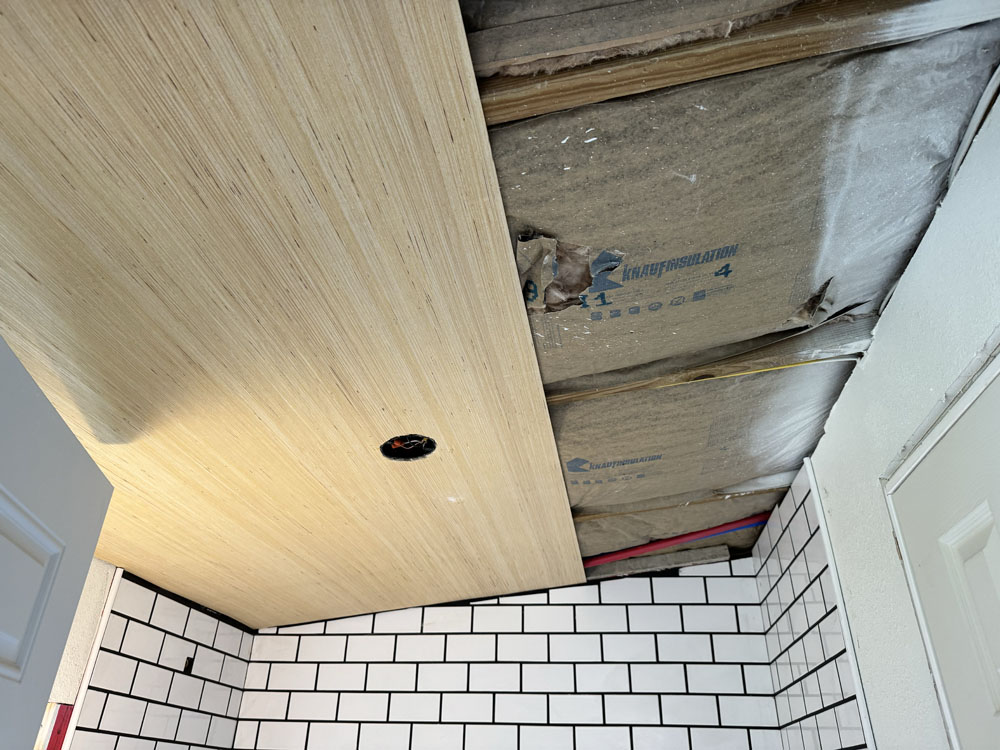
In my example, I am showing the process on a small bathroom. In here, I had to cut a hole for a light fixture right off the bat. If you are installing in a larger room, you may be able to hit the ground running and just put up lots of sheets before running into any cuts.
Cutting out for light fixtures
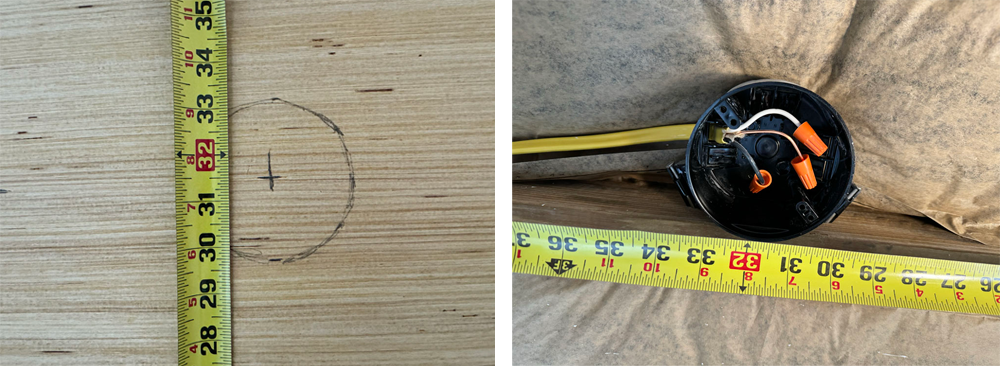
First, measure where your light fixture is from the walls. If you are cutting out a circle, I recommend measure to the CENTER. In this case, center was about 31 and 1/2. Create an “X” marks the spot by measuring from two adjacent walls. Then sketch out the circle that needs to be cut.
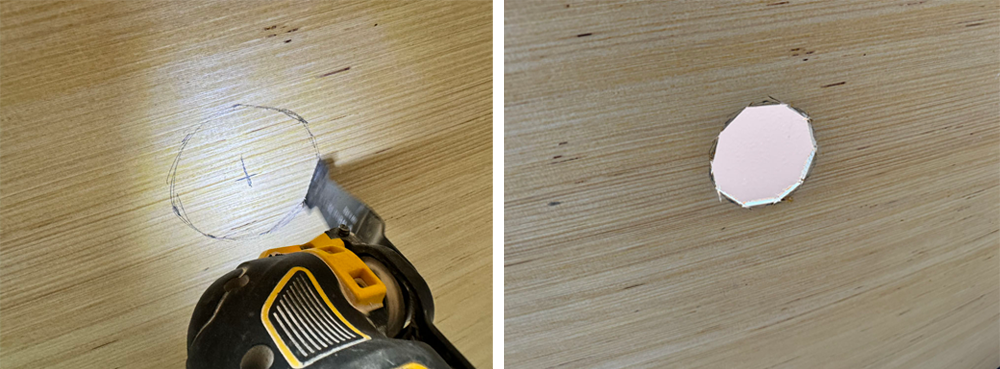
Use a hole saw if you have one bog enough, or use a multi-tool with a wood blade to cut out the circle. It’s better to cut it a little too small rather than too big.
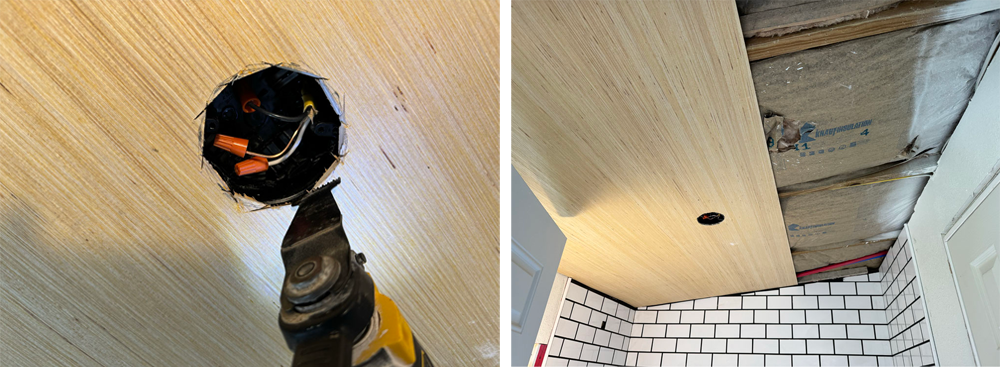
I went ahead and nailed this sheet to the ceiling with the nail gun. Once it’s up, I use my multi-tool to trim around the fixture so it will fit through the hole.
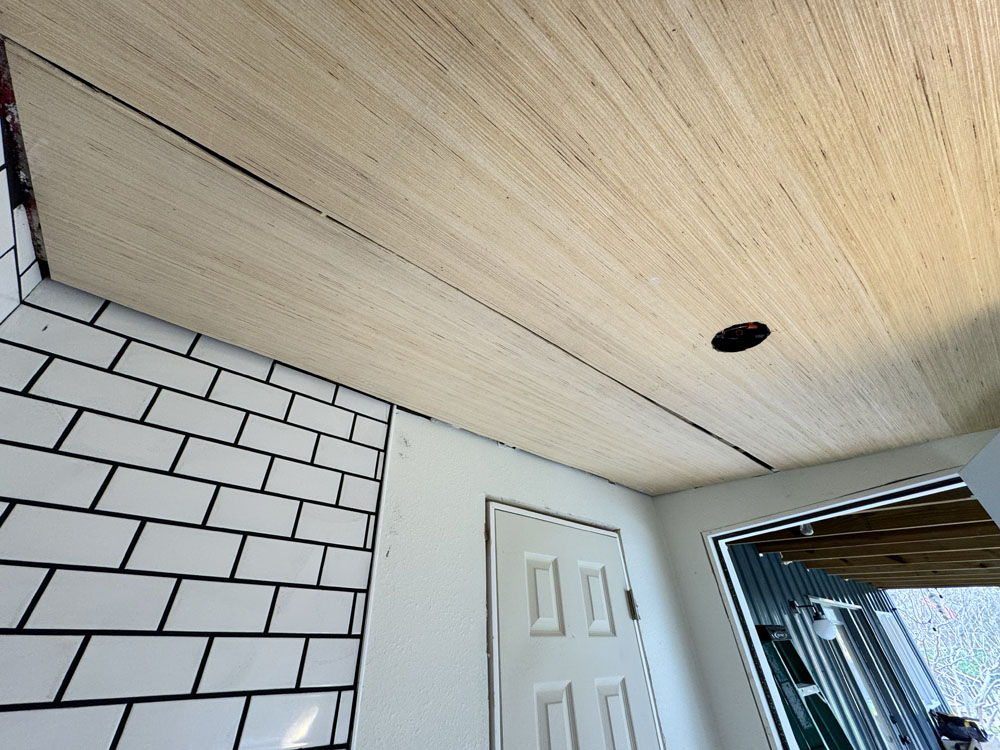
Go ahead and put up the rest of your luan sheets, making sure to keep the wood grain going in the same direction and using the same side. The good thing about this ceiling design idea is that you don’t have to make your cuts too exact around the edges. Because you are putting up 1x3s (or 1x4s), you have have at least 2.5 inches of leeway to cover up. Since this room was so small, I only had two sheets!
Step 3 – Put Up the Trim
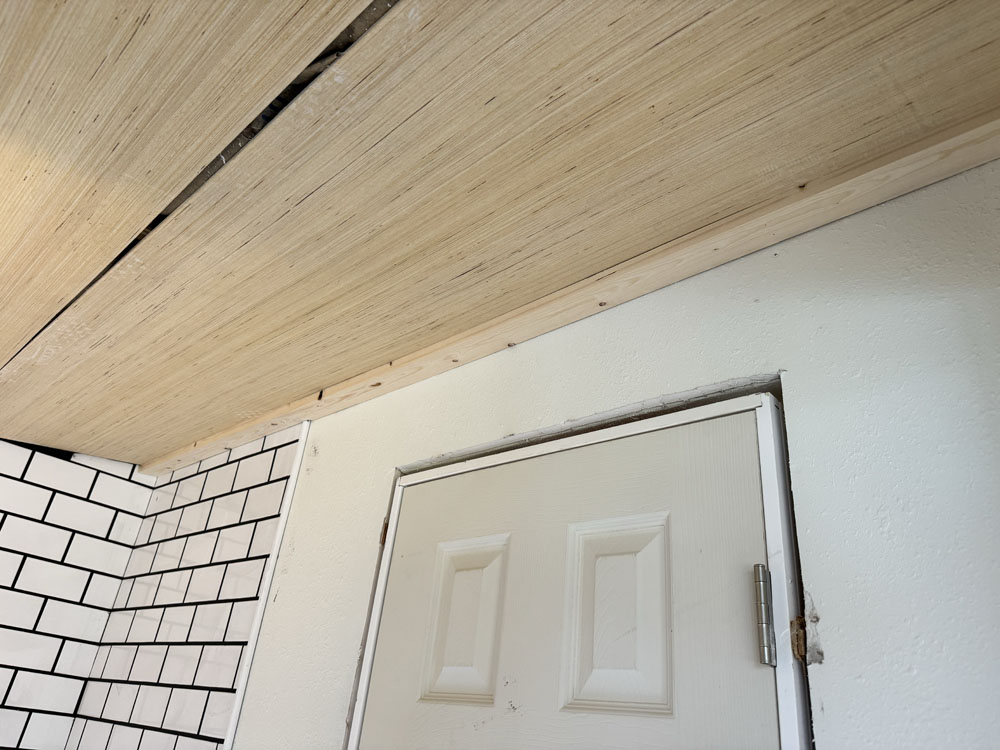
Once you have all the plywood up, it’s time to put up the trim boards. Make sure these are nailed into studs. These boards are actually what’s really holding your plywood up. Remember that you will need to put trim up at least every 48 inches so that your ceiling doesn’t begin to sag over time.
Most rooms are rectangular. I recommend starting by trimming the long sides of the room first (if your room is square, then just pick one). Once that wall is done, do the opposite wall next, then the sides.
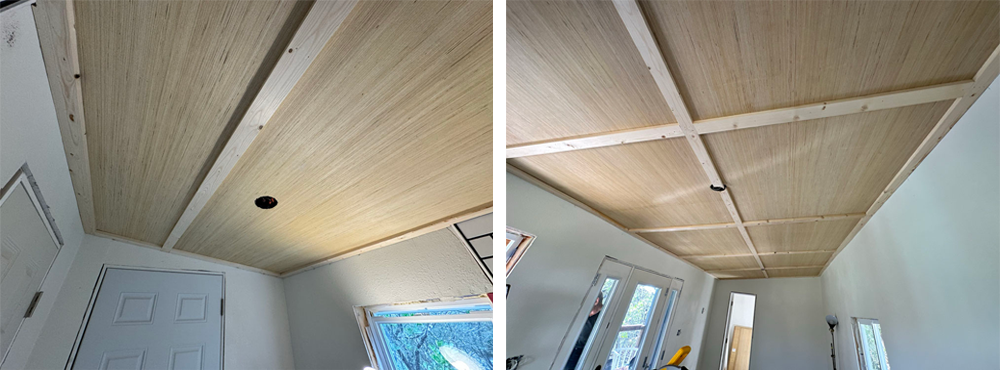
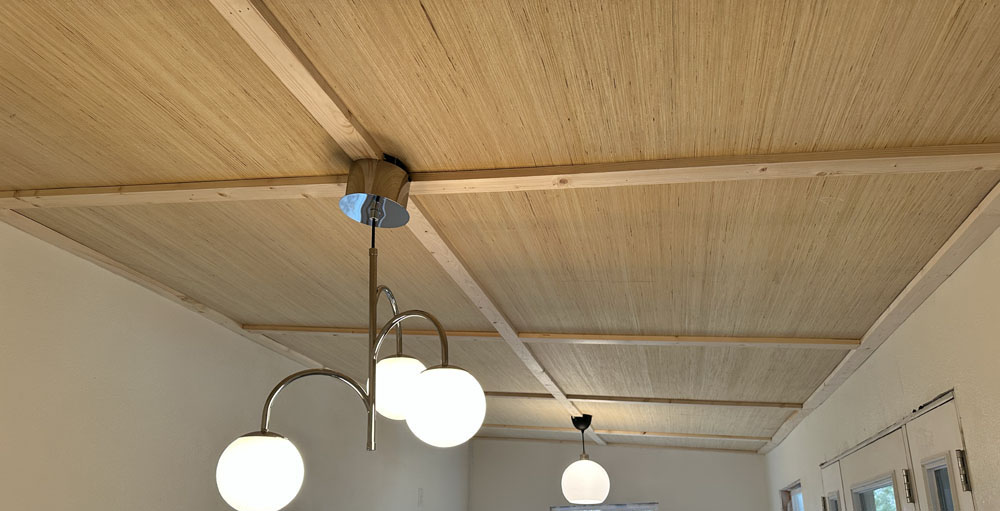
Once you have the outer edges of the ceiling completely trimmed, then start on the inside trim. On a large room like the one on the right, I put the trim all the way down the center first before adding the cross boards.
Conclusion
In conclusion, transforming a mundane ceiling into a visually appealing feature of your room doesn’t have to be an expensive or laborious endeavor. By leveraging lightweight luan plywood and common boards, this DIY project not only offers an easy and budget-friendly alternative to traditional sheetrock ceilings but also adds a touch of personal flair and warmth to any space.