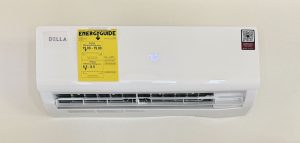
You have all your tools and all your supplies and you’re ready to go! Let’s get started with installing the indoor unit.
1. Open & Connect Wires
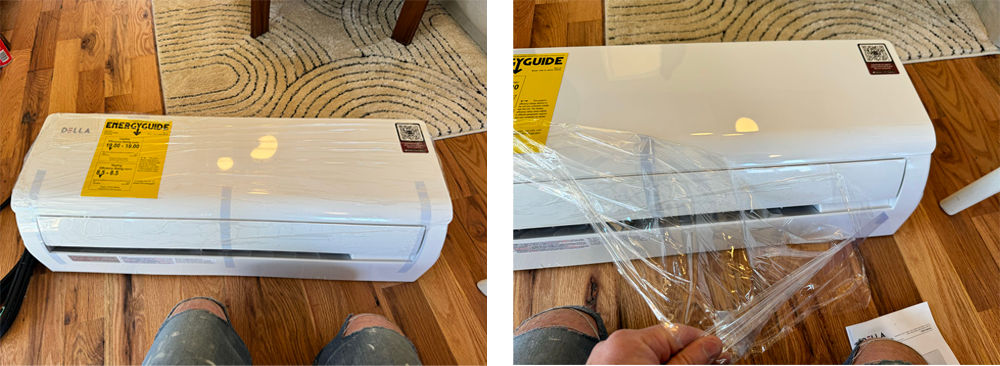
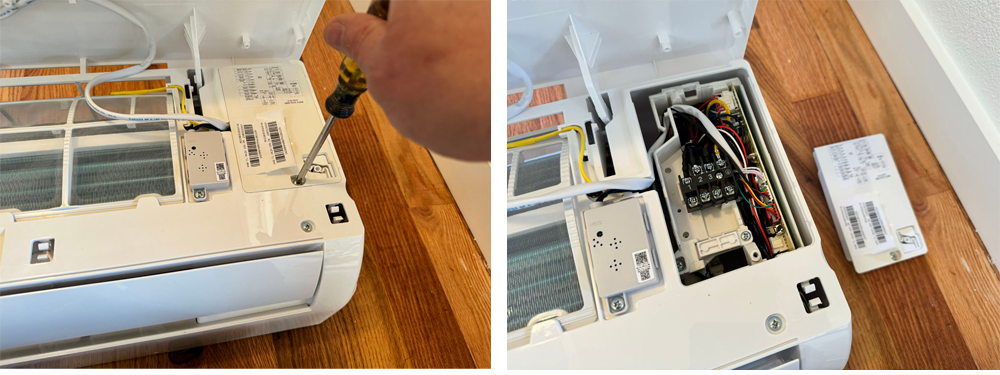
Once you get the indoor unit out of the box and the protective film removed, open the front of the unit. Using a Phillips screwdriver, remove the screw and open the door to the electrical compartment.
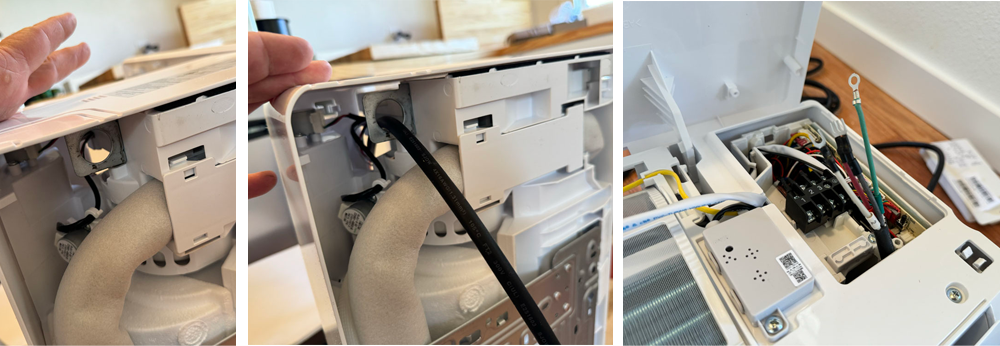
Lift the unit up so you can access the back. Thread the provided electrical cable through the hole in the frame and then into the front of the unit. Turn it back over.

Now you will connect the wires to the electrical block. You will want to use green for the ground, but besides that it doesn’t matter which colors go where at this point. Just BE SURE TO TAKE A PHOTO of the connections after you have screwed them down. Which colors went to which numbers will be important when we connect the outdoor unit.
2. Find and Mark Wall Placement

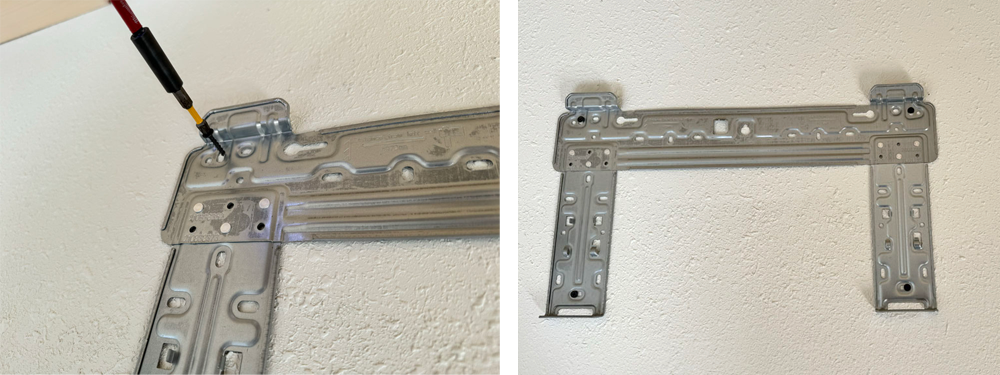
Next, flip the unit over again. Push the tabs to release and remove the wall mount from the unit.

Now it is time to determine where you are mounting the indoor unit. When you have found the general location, use a stud-finder or a finish nail (or both) and find a stud. You need to be able to line up the mounting hole locations on the included template with a wall stud. Once the holes on one side of the template are aligned with a wall stud, then the other side should also. Once you have found the right position, use masking tape to temporarily attach it to the wall.

Use a hammer and finish nail to mark the locations of your screws (All four corners). Then use them again to mark the center of the line set hole on the lower right. You can now take the template off the wall.
3. Secure the Wall Mount
Put the wall mount in place where you can see your 4 marked spots in their respective screw holes and screw it in. Any screw will work (these units are not very heavy) as long as your screw is at least 1 1/2 inches long so it can go through your sheetrock and have a good bite into the wooden stud.
4. Cut Hole for Line Set

Now you have to make the hole for your line set. Using a drill with a hole saw of 2.5 – 3 inches and the nail hole you made in the previous step as a guide, drill out your sheetrock (or whatever material your wall is made of).
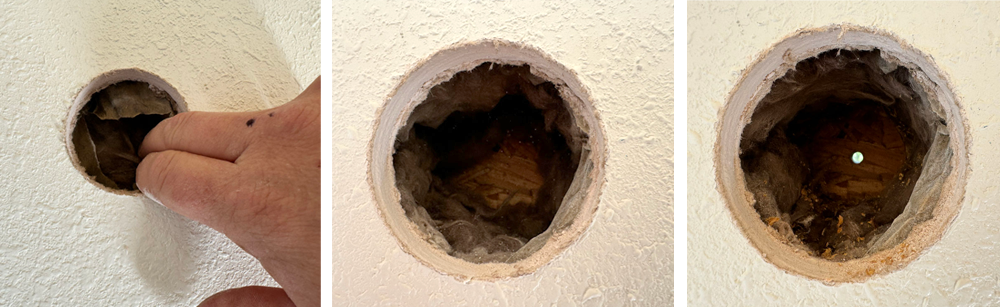
Using your fingers, you want to push away the wall insulation so you can clearly see to your outside wall material. In my case, it’s plywood. Push all the insulation completely away from your hole. Use the same hole saw and put it back into the hole. Use the drill tip to create a hole on the outside of the house. This will tell us where to drill our hole from the outside.
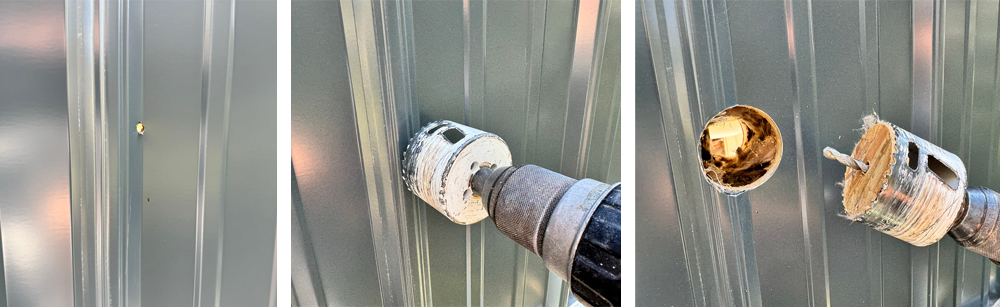
For this step, you will need to go outside with your hole saw. Using your small drilled hole as a guide, cut out the hole on the outside of the house. (If you have metal or hardi-plank, you will need a bi-metal hole saw). Now you are ready to mount your indoor unit!
5. Mount the Indoor Unit
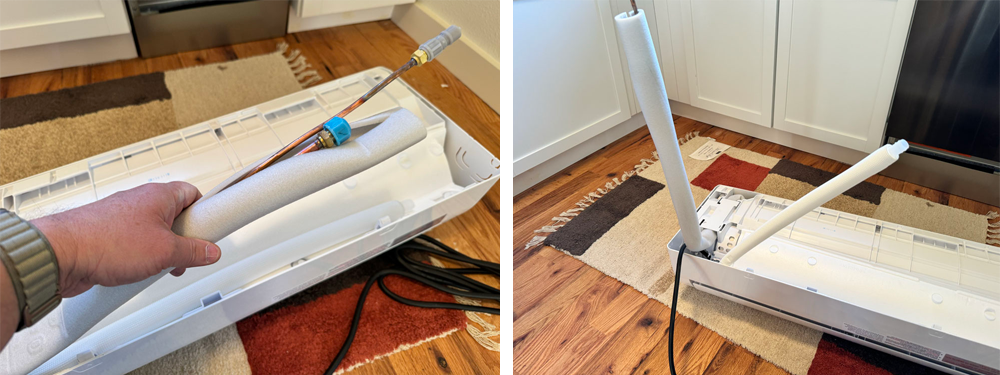
First, you will need to bend both of the copper lines 90 degrees away from the unit (as shown). ALWAYS BE CAREFUL when bending the copper tubing. If you’re not careful, it can kink instead of bend. I always do it very slowly.

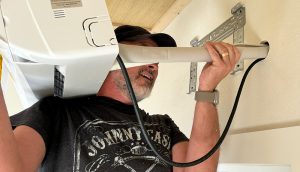
Now it’s time to mount the unit. Push the electrical cable, both insulated copper lines and the drain tube through the hole. Make sure the drain tube is located on the bottom of the bundle. The mount works pretty simply, but might take a little wrestling to get it to click in place. You will start by “hooking” the top of the unit to the mount, then pressing down on the bottom tabs until it snaps in.
Well, that does it for part one! Give yourself a pat on the back! Your indoor unit is installed. Feels good, doesn’t it?
Let’s get started on Part Two…
How to Install a Mini Split – Our Step-by-Step Guide
Mini Split Install – Vacuuming and Charging
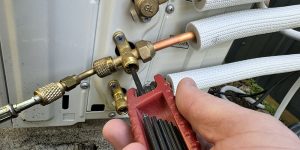
Mini Split – Outdoor Unit & Making the Connections
Mini Split – Installing the Indoor Unit